Wondering how to set up a webinar on Zoom?
While most of us are familiar with using Zoom to meet and chat with others, it can indeed also be used for webinars.
So how does Zoom facilitate delivering webinar presentations?
This post gives you all the information you need.
First, let's get clear on exactly what Zoom webinars are...
What Are Zoom Webinars?
Many of us are more familiar with webinars where you don’t see the presenter, but instead just hear them speak while looking at the information they are presenting via a PowerPoint-type presentation.
On Zoom, that changes. With a Zoom webinar, you see one or more presenters talking on the screen via live video, in a format similar to Facebook Live.
With Zoom webinars, you can reach up to 50,000 people. Unlike Zoom meetings, only the presenters are seen on-screen, a bit like Facebook Live.Click To Post OnIn fact, while broadcasting your webinar via Zoom, you can also live stream the same event through Facebook Live, as well as other streaming services such as YouTube Live.
In brief, Zoom webinars can give the audience an experience that feels more personal and engaging, while allowing the business to reach up to 50,000 people (in contrast, with GoToWebinar for example, you can reach up to 3,000).
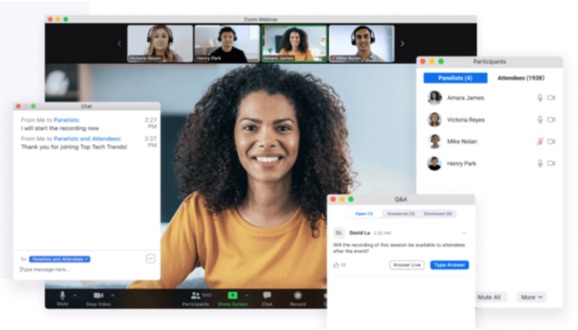
You can also let attendees join the presentation itself, by sharing their audio and video. This can be helpful for example when allowing attendees to ask questions about the info you’re presenting.
In addition, you also get access to the type of webinar tools you might be used to, including:
- The ability of attendees to respond to polls and raise their hand.
- A chat tool for use during the session.
- A post-webinar landing page.
- A customizable registration page for the webinar.
- Customizable reminder emails.
Registrant details can be automatically pushed through to your autoresponder service or CRM, such as via Zapier, so you can follow up with them and help convert into customers.
Or if the webinar itself is the product, you can run paid registration webinars too.
And once the event itself has finished, you get data on things like the following, which can all be exported into a CSV for analysis in Excel or similar:
- Webinar attendance
- Audience engagement
- Responses to polls and surveys
Now let's take a look at how to set up a Zoom webinar...
Setting Up a Zoom Webinar
1. Getting Your Zoom Webinar License
First, you’ll need a Zoom Webinar license, which at the time of writing is $690/year (or $79/month) for up to 500 attendees.
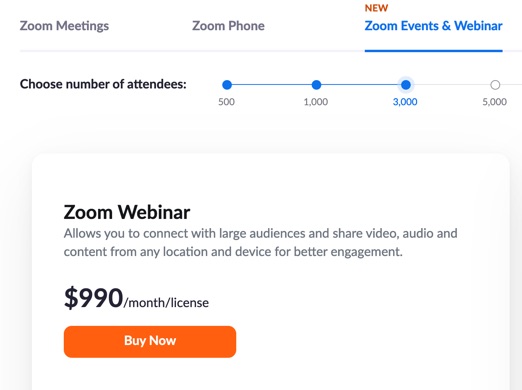
Other pricing graduations are as follows—check Zoom’s site for the most up to date info:
- Up to 1,000 attendees—$3,400/year (or $340/month)
- Up to 3,000 attendees—$9,900/year (or $990/month)
- Up to 5,000 attendees—$24,900/year (or $2,490/month)
- Up to 10,000 attendees—$64,900/year (or $6,490/month)
Or for even more attendees, contact Zoom directly.
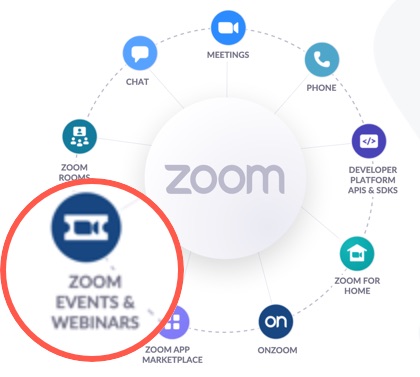
To create a webinar on Zoom, you first need a Zoom Webinar license. Pricing is based on the number of attendees required.Click To Post OnThere is also the Zoom Events option for around 20% more cost, which includes webinars, but also has advanced functionality for whole events provided virtually, such as multi-day, multi-track events.
2. Schedule a New Webinar
From the Zoom dashboard after logging in, select Webinars from the left-hand navigation.
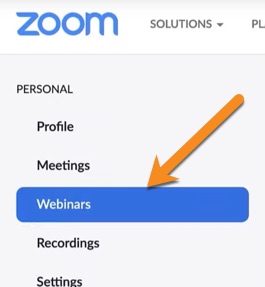
Click the Schedule a Webinar button towards the top.

You’ll then be asked to fill in the details about your webinar.
Note that in your own Zoom account, you might not see all the options described here. That’s because they can differ depending on factors such as your role, account type and other settings.
The initial details requested for setting up your Zoom webinar are as follows:
- A name (under Topic).
- A description—this will be used to pre-populate your webinar registration page (if using).
- A template—this can save a lot of time if you’ve set up other webinars on Zoom, but you won’t be able to do this when setting up your first one.
- When your webinar will occur, including the date and time, time zone and duration. The duration just helps to provide an indication to attendees, but don’t worry if your webinar goes on for longer, it won’t suddenly shut down!

There’s also an option to set the webinar to be recurring. You can set it to recur say once a week, and specify when you want to end it:
- On a specific date…
- Or after a certain number of occurrences.
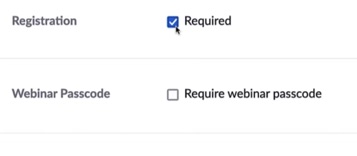
Registration Options
You can set up your webinar so that it requires registration, or choose to make attendance freely available via a URL.
When making registration required, attendees will be asked for details such as their name and email address.
You can ask for additional details such as their postal address, company name, and so on.
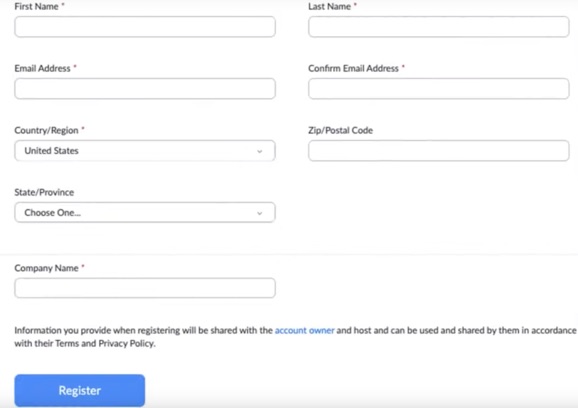
To turn on registration, click the checkbox provided as shown:
If you’ve set the webinar to be recurring, you’ll see some additional options, allowing attendees to:
- Register once and then attend any of the occurrences
- Register for each occurrence they wish to attend
- Register once, and then choose which occurrences to attend

Webinar Passcode
To help control who attends your webinar, you can require attendees to enter a webinar passcode.

This can be used in conjunction with registration, or as a separate option.
Zoom provides a default passcode that can then be edited as required.
Camera Options
Most of us are familiar with Zoom meetings where everyone on the call can turn their camera on or off as required.
Zoom webinars operate differently, with the ability to turn the camera on and off restricted to the host and any panellists.
In setting up the webinar, the following controls determine whether the camera should be on or off by default at the start of the webinar.
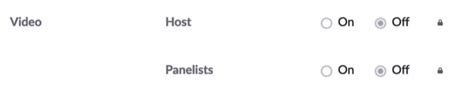
It’s recommended to leave these set as Off.
Audio Settings
Zoom provides various options for how attendees can listen to the audio of your webinar:
- By telephone
- By computer audio
- With a mix of both telephone and computer audio
- Third-party audio
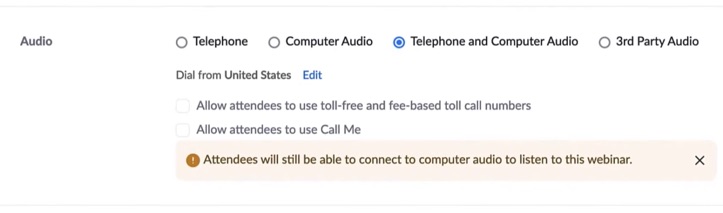
For the telephone options, you can set it so that attendees are only able to dial in from specific countries.
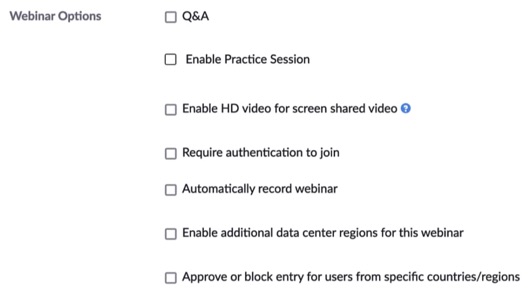
Additional Webinar Options
Additional options that Zoom provides for your webinar includes the following:
- Q&A—turn this on so that attendees can ask questions during the webinar by typing into a chat area. These can be answered by the host and any co-hosts or panellists.
- Enable practice session—this means you can familiarize yourself with all the controls that will be available during the live session, without actually being live. This is also available to your panellists and co-hosts.
- Enable HD video for screen shared video—this gives the highest quality video, but can significantly increase bandwidth so may reduce the experience for users on slower connections.
- Require authentication to join—checking this option means that users have to be signed into Zoom before joining the webinar. This can for example help increase the security of your webinar if required.
- Add watermark that identifies the attendee—this is useful when you want to help prevent the session from being recorded, as any recordings will clearly show the attendee’s email address across the screen, and therefore be traceable back to the registrant.
- Automatically record webinar—if you’ve ever hosted a webinar where you realize afterwards that you forgot to record it, you’ll already know the value of this setting. Checking the box will mean the webinar is recorded automatically for you, with options to store the recording either on your local computer or in the cloud.
- Enable additional data center regions—available for certain account types, checking this box helps improve the experience of attendees when for example attending from different countries.
- Approve/block entry for users from specific countries or regions—restrict attendees to those from (or similarly, block attendees from) specific countries or regions only.
Add Other Hosts
This is where you can add other hosts to your webinar. For example, you may want someone to:
- Start the webinar for you
- Help during the session with answering questions from attendees
- Add or edit polls
Once you’re happy with all the information you’ve entered, click the Schedule button provided.
Don’t worry if you need to change anything. You can return to the webinar details page at any time to make edits.
You’ll also see an option to save your webinar as a template. Doing so can save a lot of time when setting up webinars in future, if for example you want to use similar settings.
3. Practicing Your Webinar
Presumably you've already created your webinar.
It's always a good idea to practice it before the event itself, particularly if you’re new to running webinars on Zoom.
Zoom webinars make it easy to start a practice session, so you can get used to how it all works before the real event.Click To Post OnTo do so, after scheduling your webinar, or by clicking through to your webinar from the listings page, click the Start Practice Session button.
This will start a session that the host along with any co-hosts (a.k.a. alternative hosts) and panellists can easily join.
For the real event, you can also start broadcasting the webinar—in other words, go live—from within the practice session.
However, before the event itself, you can start and end a practice session as many times as you wish.
4. Inviting Attendees
Webinars Without Registration
If you didn’t check the box to require registration for your webinar, you can simply send people a URL through which they’ll be able to join.
Find this via the Invitations tab at the bottom of the webinar details page.
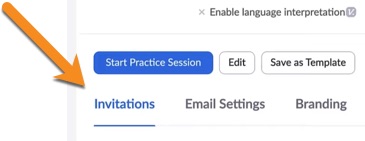
Look for the Invite Attendees section for the link you need, along with an invitation you can copy that contains all the details.
Webinars With Registration
Look to the Invitations tab, as shown above, and look for the registration options under Invite Attendees.
You can choose to either automatically or manually approve people who register.
As above, you’ll also see the URL—this time for registration, rather than direct attendance—along with an invitation.
If you’ve set the option to manually approve registrants, you can do this by clicking back through to the webinar details page, and looking for the Manage Attendees section.
Attendees will receive their invitation by email once approved.
5. Starting Your Webinar
So, the time and date of the webinar has arrived.
How do you actually start it?
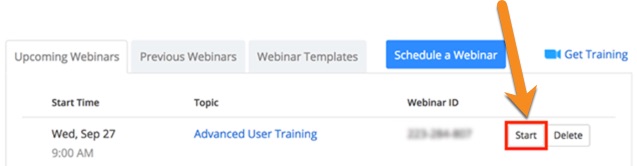
As well as the ability to start your webinar via a practice session (see above), you’ll also see a Start button next to the webinar on the webinar listings page (click through on Webinars via the navigation).

Frequently Asked Questions
What are Zoom webinars?
On Zoom, webinars feature live video of presenters (similar to Facebook Live) and can reach up to 50,000 viewers.
How can I set up a Zoom webinar?
To set up a Zoom webinar, first, acquire a Zoom Webinar license based on the desired number of attendees, then schedule the webinar with specific details and optional features.
Why should I practice a Zoom webinar?
Practicing a Zoom webinar allows you to familiarize yourself with the platform's features and ensure a smooth presentation during the actual event.
To Conclude
Webinars are a great way to build relationships with your audience, as well as a powerful sales tool.
And now you know exactly how to set up a webinar on Zoom, enabling you to approach it with confidence.