Webinars are a key tool for:
- Growing your list
- Building relationships with subscribers
- Converting them into customers, and thereby growing your revenue.
Even after the event, the webinar helps you build audiences across different platforms through repurposing, such as by:
- Sharing excerpts of the recording on social media
- Adding longer portions to YouTube
- Adding to email campaigns to build your authority
- Repurposing into content for your website, such as blog posts
The advice in this post is based on over 20 years' experience of creating and presenting dozens of webinars, often with hundreds of attendees, including via joint venture partners.
Once created, you have a powerful asset to help grow your business.
But before you start, the first step is to get clear on the following four key questions…
The Four Key Questions to Ask Before Creating Your Webinar Presentation
1. What’s the Goal of Your Webinar?
It’s important to be clear on what you are hoping to achieve with your webinar, as this determines the overall structure of the information you’ll be presenting.
Common objectives include the following:
- Sales conversions
- Lead acquisition
- Audience growth (such as by repurposing the content for social media and other content platforms)
- Nurturing your list
2. Who's Your Audience?
Determine who your target audience is for your webinar.
This is akin to developing a detailed customer avatar to help you create messaging that resonates with your ideal customer.
You need to know who the ideal attendee is for your webinar so you can speak directly to them.
Otherwise, they may not stick around, or worse, not register for it in the first place.
You need to be able to answer questions like:
- What are their likes and dislikes?
- What are their needs and desires?
- What motivates them?
- What problems and pain points do they have?
- What are their interests?
3. How Will You Run Your Webinar?
Roll back a decade or so, and the main option for running a webinar was GoToWebinar along with two or three main competitors.
Now there are a myriad of options, including live streaming video on social media such as Facebook Live.

But that’s just the software or mechanics of running the webinar.
Other aspects to consider include:
- Will you be presenting alone, or with one or more colleagues or joint venture partners?
- Will you be presenting with a mixture of face-to-screen and the presentation (e.g. Powerpoint) itself, or just the latter?
- Will you be presenting it live, or recording it in advance to then use as an evergreen webinar presentation—or perhaps doing the former to start with, but then reusing it as the latter?
All of these decisions influence how you'll put your webinar presentation together.
4. What Topic Will You Cover to Achieve Your Objective?
For example, let’s say your objective is to convert webinar registrants into customers.
If so, your webinar will in some way need to show how your product or service helps them, such as providing a solution for a particular problem or pain point.
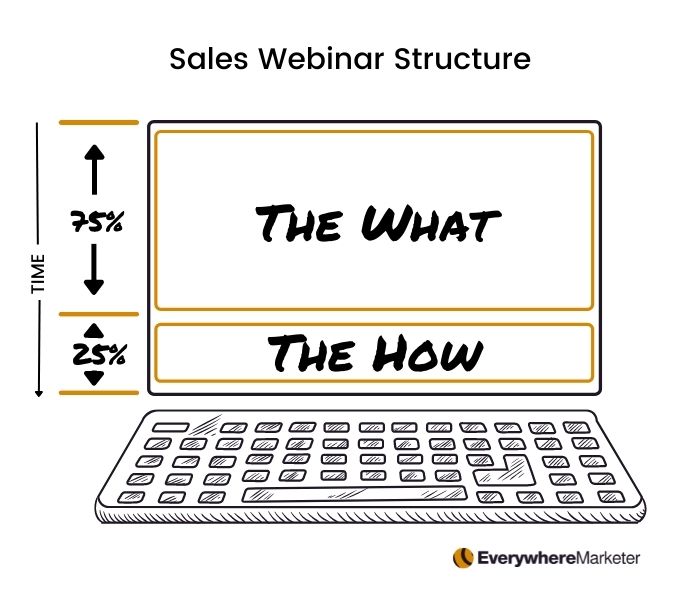
An effective structure for this type of presentation would involve the following:
- For most of the presentation, teach the audience what they need to do
- For the remainder, towards the end, teach them how to do it, usually in a quicker or easier way with the help of your product or service. This will lead you into the sales close.
In other words, you need to be sure that what you’ll be covering helps you achieve your stated objective.
Before creating a webinar presentation, know your objective, your audience, how you'll run it, and the topic you'll be covering to achieve your objective.Click To Post OnCreating Your Presentation
I’m going to assume you’ll be running a Powerpoint-style presentation, even if there’s some face-to-camera time involved too.
Before starting to create it, it’s a good idea to first create a general outline or structure for what you want to cover.
Create the Overall Structure
Start with a Working Title
I nearly always start with the title…
This is not necessarily the final title, but provides a single sentence summary of your presentation’s content that you can then work from.
In other words, what is your presentation about?
It’s not much different from creating a title for an article, blog post, video or some other type of content.
It needs to:
- Appeal to your target market
- Be catchy
- Be clear about the value the webinar will deliver.
Here are some sample webinar titles that have passed through my inbox recently:
- How to Enrich Your Zoom Meetings with Interactivity (Zoom)
- How To Exploit “Micro-Fluctuations” In Crypto To Make 100’s Of Tiny, Profitable Trades Every Single Day - On Autopilot! (Rapid Crush, Inc)
- Slack 101: How to Use Slack (Slack)
- How to Leverage Free Marketing for an 8-Figure Brand (DigitalMarketer)
- SEO Basics to Supercharge Your Content Performance (Content Marketing Institute/Conductor)
- How to Promote an Event Attendees Can't Wait to Sign Up For (MarketingProfs)
Notice how all but one of these titles incorporates the words “How to” (the other one could have done so too, but chose to use a slightly different structure).
Chances are that you could use a how to-type title too.
Try brainstorming with a notepad and coming up with 3-5 different titles. Pick one, and run with that for now.

As you build out the rest of the webinar, you may be inspired to change or refine it. If not, you’ll probably still want to return to it at some point and fine tune it. For now, it just gets you out the starting gate.
Create An Outline
With your title in hand, you can now create a rough outline or structure of what you’ll be covering.
Most webinars tend to run for around 60 to 90 minutes, depending on the topic. Some run for a lot longer, but they’re not so common.
For now, aim for 60 minutes.
The structure for most of my sales webinars, as well as those I’ve attended, tend to look like this:
- First ten minutes or so—introduction to the presenter and what they’re going to be covering.
- Thirty to forty minutes—the bulk of the presentation, delivering on the promise of the title.
- Last ten to twenty minutes—concluding your webinar by transitioning to and delivering the sales close.
For non-sales webinars, such as where you’re intending to just educate, it’s not much different. Simply skip the last section or turn it into a brief recap of what you’ve covered along with any next steps the audience should take.
It’s likely that each slide on average is going to take 2-3 minutes to run through — so for a 60 minute presentation, you’re looking at around 20-30 slides.
With 3-4 slides at the beginning, and 7-10 slides at the end for the sales close, that leaves you with somewhere between 10 and 20 slides for the bulk of the presentation.
Note this is only a rough guide, they’re not hard and fast rules!
The Bulk of the Presentation
You’ll likely be covering around 10 to 20 points in this section, with some requiring more than one slide.
Start creating your outline by coming up with these 10 to 20 points, getting them into a logical order.
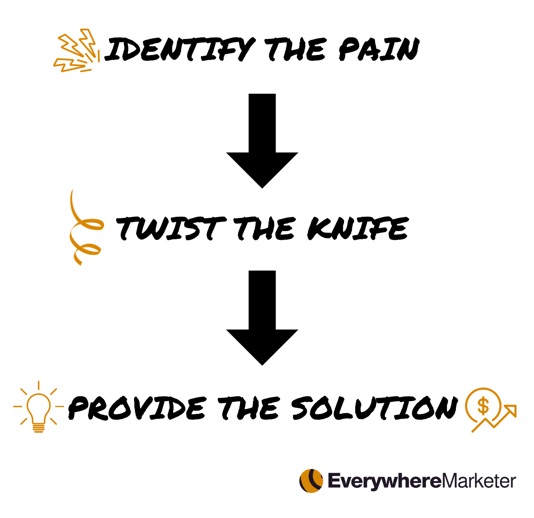
For a webinar presentation designed to get sales, the main section should follow the rough structure of a sales letter, and may look something like the following:
- Identify the pain point or the problem. This is what your product or service ultimately addresses, though you won’t refer to it just yet.
- Twist the knife. This is where you agitate the pain point or problem so your audience really resonates with it, feels it, and understands the consequences of not addressing it.
- Start presenting the solution. This won’t yet present your product or service, but essentially lets your audience know what they can do to address the pain or problem you’ve identified, without yet telling them how to do that.
When you get to the sales part of the presentation (see The Conclusion below), this is where you’ll typically transition into letting them know how they can achieve what you’ve just presented in a quicker or easier way.
For example, you might be selling:
- A product (such as some software) that helps them do it easily and efficiently.
- A service that can help take care of it for them.
- Coaching that guides them through and provides support for achieving a specific outcome.
The Introduction
Now that you know roughly what you’ll be covering in the bulk of your webinar presentation, it’s easier to come up with a rough outline for the introductory section.
This will of course be a lot shorter, and essentially you will be:
- Introducing yourself
- Building your authority so your audience starts to trust that you’re someone worth spending their time listening to
- Telling them what you’ll be covering
The purpose of the intro is to set the stage while maximizing the chances that attendees will continue to stick around. Doing the following can help retention levels:
- Encourage them to minimize distractions such as by switching off mobile devices
- Let them know about something valuable you’ll give to them for free if they stick around until the very end, such as a useful resource.
For sales presentations, these can all make a significant difference to the end results.
The Conclusion
So you’ve got outlines for the introduction as well as the bulk of the presentation. Finally, you need a rough outline of how you’ll be drawing the webinar to a close.
This will be a bit more involved for a sales-based webinar. As stated above, you’ll be telling your audience about how your product or service helps address their pain point or problem in an easier, more effective way than they may have otherwise thought.
You’ve told them what they need to do. This is where you give them the how.
You’ll then run through your offer—to maximize conversions, this should be as appealing as possible while also having a sense of urgency—and tell them how to take advantage, such as a specific link they need to go to.
For a purely informational webinar, of course you don’t need any of that. Instead, you could perhaps:
- Offer a recap of the material you’ve provided
- Let the audience know about any free resources you may have available
- Let them know how to connect with you on social media
- Tell them about anything coming up, or how they could extend what they’ve learned so far
Create the Presentation
By now, you’ve got an overall plan for everything you’ll be covering in your webinar, and can start to put the actual slides together.
For a sales webinar, this should nearly always be carefully crafted into a script so you know exactly what you’re going to say and you’re not leaving it to chance.
Otherwise, for an informational webinar, you might still choose to script it, or can otherwise use bullet points for each slide to guide what you’ll talk about.
These might appear on the slide itself, but this isn’t always the case (such as when you’re showing just an image or diagram on the slide).
I generally like to craft the script and the slides in tandem. So as I create each slide, I’ll also script out what I want to say for each one.
The script will be very rough to start with. Once the whole presentation has been built, I can then run back through it (potentially multiple times) to polish it. Ultimately it needs to be crafted as carefully as a sales letter.
For informational webinars, these can be a lot more ad hoc, and so are generally a lot quicker to put together.
Properly crafting an effective hour-long sales webinar can literally take a few days.
For a sales webinar, it needs to be crafted as carefully as a sales letter. That includes creating a script, and repeatedly practicing the delivery.Click To Post OnSoftware for Creating the Webinar Presentation
Software choices include:
- Microsoft Powerpoint
- Google Slides (within Google Docs)
- Keynote (for Apple Macs)
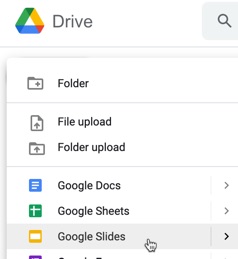
Personally I always use Google Slides as:
- It’s easy to use
- It’s available from any computer
- You don’t have to worry about backups
- It’s easy to access and reopen the presentation at any time.
The Very First Slide
The first slide of your presentation is what people will see when they’re waiting for the webinar to start.
This will generally include the title of the presentation and a logo associated with your business so people know they’re in the right place.
Even if you’re not appearing face-to-camera, it’s usually a good idea to include the faces of the presenter(s) on this first slide to help personalize the experience for the audience so they know who they’re listening to.
In addition, include some kind of reminder to attendees to check the volume levels on their computer.
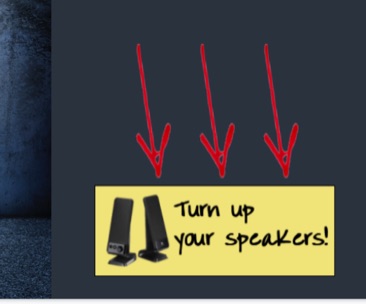
Otherwise you’re likely to receive multiple comments in the chat early on in the session from people saying they can’t hear you, simply because they’ve muted their computer in some way.
This can be distracting, not least for other attendees who can hear you perfectly well.
That said, it’s key to remember to turn on your microphone at the start of the webinar. After forgetting to do this once or twice, I found Post It notes stuck to the screen before starting are invaluable!
The Final Slide
When you reach the end of the presentation, you will likely have a period of time when you answer any questions from attendees.
This is when your final slide will remain on the screen for perhaps several minutes, and it’s a good idea to ensure that any final call to action for your attendees is showing on this screen.
For example, for a sales-based webinar presentation this will likely include the link that attendees need to go to to take advantage of your offer.
For a relationship-building, information only webinar, you may have details about the next steps attendees can take in their relationship with you, such as:
- Connecting with you on social media
- Applying for a free one-to-one consultation
- Making some other appointment with you
- Downloading a free resource from a link such as a whitepaper
- Sending an email somewhere to indicate their interest in something
Polish and Refine It
The good news is that you’ve now created your webinar presentation—kudos!
The bad news is that you’re not done yet!
It’s important to now go through the presentation to polish and refine it.
Preferably this should be after some time away from it, ideally a few days, so that you return to it with fresh eyes.
You’ll be surprised by:
- What you spot such as errors and things on the page or in your script (if you’re using one) you didn’t intend
- Just how much you can improve it by this process
By the time you’re done, you’ll have a presentation you feel both proud of and fully confident in.
Plus, you’ll be familiarizing yourself with the presentation, which helps when you come to more formally practice it and run the webinar for real.
To polish the webinar, simply run through it from the start, including running through the script or bulleted talking points.
Speak what you intend to say out loud (under your breath is fine at this stage) as you run through it, and you’ll spot things that don’t look right on the screen as you’re speaking, or things that are out of place or could be worded better for a more natural delivery in the script.
You might even identify issues with the overall structure of the presentation that you can then resolve.
Run through it in this way at least a couple of times, preferably at least a day apart.
Yes, it takes time to do.
But you’re also creating a hugely valuable asset that can be used in a myriad of different ways, not least for rapidly building relationships with prospects and attracting customers into your business, and well worth the investment of that time.
Practice Delivering Your Webinar Presentation
So you now have a built and polished webinar that’s ready to be delivered live.
But before that happens it’s essential to practice!
This builds the familiarity you need to have with the material so that your delivery is polished too, that attendees have a positive experience, and that you can reuse the recording (always record it!) in different ways in future.
Practicing means running through it as if you are running it live.
Imagine people actually in attendance, and speak as if they are actually there.

Run through it from start to finish enough times so that you’re able to do this consistently and with confidence in all the material. Ideally this should be at least two or three times.
Although you’ve previously polished the webinar, even at this stage you might spot the odd thing you need to correct. Make the correction and then continue, but make sure you run through it at least once or twice where it’s seamless and without any such stoppages.
You then know that you’ve successfully created a webinar presentation and that you’re ready to go live!
Frequently Asked Questions
What are the four key questions to ask before creating a webinar presentation?
Before creating a webinar presentation, get clear on the goals, audience, how it will be run, and the topic to cover.
What is a powerful structure for a sales webinar presentation?
A powerful structure for a sales webinar follows the pain-agitate-solution formula—identify the pain, twist the knife and then provide the solution.
How should I create the overall structure for my webinar presentation?
Start with a working title, create an outline, and structure the introduction, main content, and conclusion accordingly.
What software options can I use to create a webinar presentation?
You can create a webinar presentation using software like Microsoft Powerpoint, Google Slides, or Keynote.
How can I practice delivering my webinar presentation effectively?
Practice delivering your webinar presentation as if it's live, run through it multiple times, and ensure a seamless and confident delivery.
To Conclude
You now have a full guide on how to create a webinar presentation, right from defining your objective and deciding how to deliver the webinar, through to having a polished and refined presentation you’re fully confident in and ready to deliver live.
Don’t forget that once you’ve delivered your webinar one or more times, you can repurpose the content in multiple ways that help you attract prospects and customers across multiple channels in true ‘everywhere marketing’ style.